














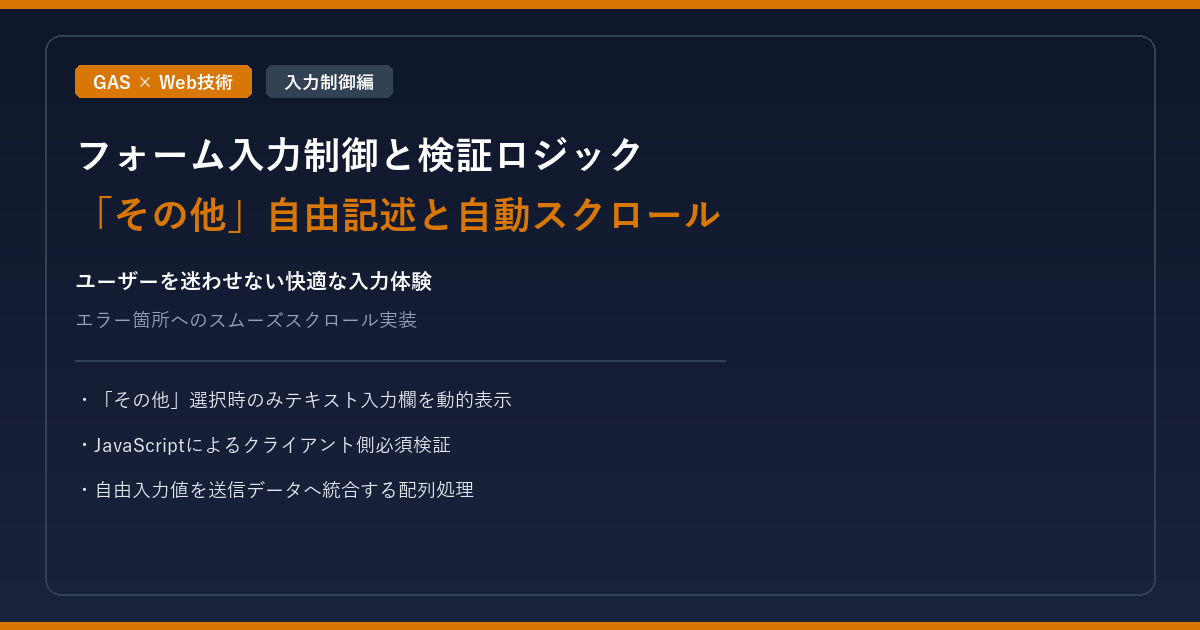
実際のWebフォーム運用では、選択肢に用意されていない要望を拾うために「その他」項目を設けたり、必須項目が正しく入力されているかをチェックする「バリデーション」が不可欠です。
今回は、「その他」選択時のみテキスト入力欄を出現させるUI制御と、未入力項目がある場合に親切に該当箇所へスクロールさせるユーザビリティ向上の実装を解説します。
連載目次:GASで作る高機能Webフォーム開発ガイド
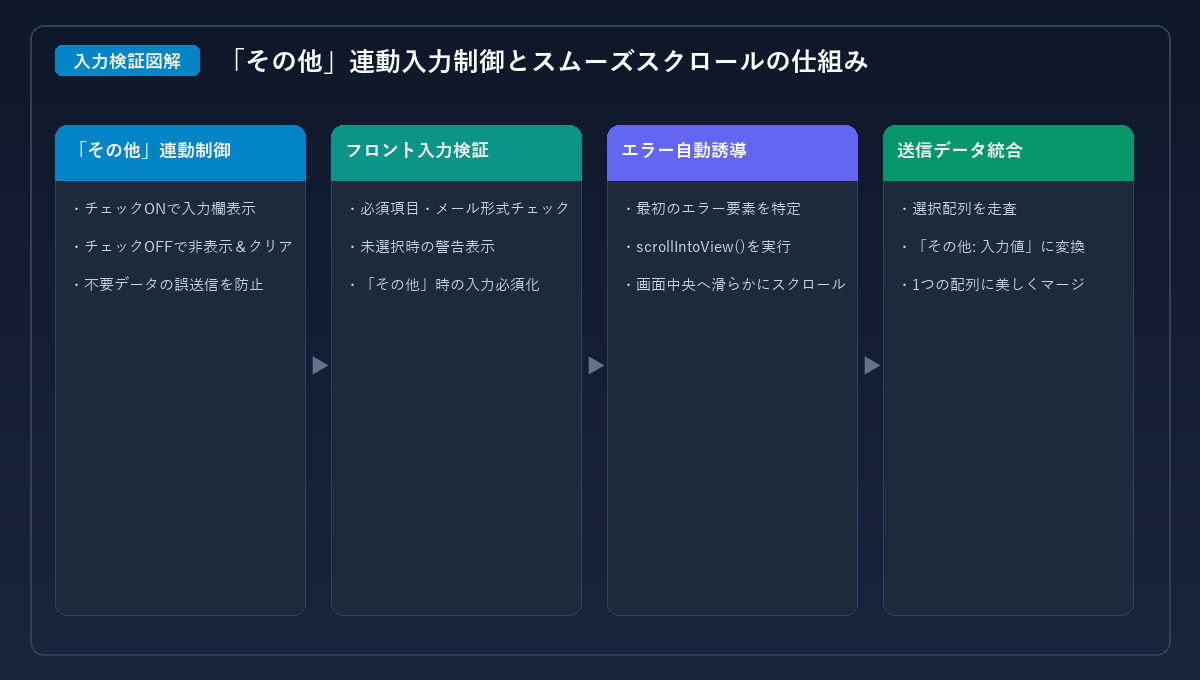
「その他」連動入力制御とエラー時スムーズスクロールの処理フロー
「その他」選択時のみテキスト欄を表示する動的制御
最初から「その他の詳細」入力欄が常に表示されていると、フォームが縦に長くなりユーザーに圧迫感を与えてしまいます。「その他」にチェックが入った時だけ入力欄を表示し、チェックが外れたら隠す設計が理想的です。
function setupOtherInputHandlers() {
  const fieldNames = ['category', 'service', 'trigger'];

  fieldNames.forEach(function(fieldName) {
    const checkboxes = document.querySelectorAll('input[name="' + fieldName + '"]');
    const otherInputContainer = document.getElementById(fieldName + '-other-input-container');
    const otherInput = document.getElementById(fieldName + '-other-input');

    if (!otherInputContainer || !otherInput) return;

    checkboxes.forEach(function(checkbox) {
      if (!checkbox.dataset.otherHandlerSet) {
        checkbox.addEventListener('change', function() {
          if (this.value === 'その他' && this.checked) {
            otherInputContainer.style.display = 'block';
          } else if (this.value === 'その他' && !this.checked) {
            otherInputContainer.style.display = 'none';
            otherInput.value = ''; // チェック解除時は入力内容をクリア
          }
        });
        checkbox.dataset.otherHandlerSet = 'true';
      }
    });
  });
}
チェックが外れた瞬間に otherInput.value = '' で入力文字を消去している点が大切です。誤って入力した文字が意図せず送信データに残ってしまう事故を防ぎます。
送信前の入力チェックとエラー箇所の特定
送信ボタンが押された際、必須項目が未入力であれば即座に処理を中断し、分かりやすいメッセージを表示します。
let hasError = false;
let firstErrorElement = null;

// お名前(テキスト)の必須チェック
const fullName = document.getElementById('fullName');
if (!fullName.value.trim()) {
  const errorEl = document.getElementById('fullName-error');
  errorEl.style.display = 'block';
  if (!firstErrorElement) firstErrorElement = errorEl;
  hasError = true;
}

// チェックボックスの選択チェック
const selectedCategories = Array.from(
  document.querySelectorAll('input[name="category"]:checked')
).map(cb => cb.value);

if (selectedCategories.length === 0) {
  const errorEl = document.getElementById('category-error');
  errorEl.style.display = 'block';
  if (!firstErrorElement) firstErrorElement = errorEl;
  hasError = true;
} else if (selectedCategories.includes('その他')) {
  // 「その他」が選ばれている場合の追加入力チェック
  const otherInput = document.getElementById('category-other-input');
  if (!otherInput || !otherInput.value.trim()) {
    const errorEl = document.getElementById('category-error');
    errorEl.textContent = '「その他」を選択した場合は、詳細内容を入力してください。';
    errorEl.style.display = 'block';
    if (!firstErrorElement) firstErrorElement = errorEl;
    hasError = true;
  }
}
単にチェックボックスが選択されているかだけでなく、「その他」が選ばれている場合は自由入力欄の記入まで必須にすることで、回答の抜け漏れを確実に防ぎます。
scrollIntoView によるスムーズスクロール案内
画面のどこかでエラーが起きた際、どこに問題があるか分からないとユーザーは離脱してしまいます。
エラーが見つかった最初のエレメント(firstErrorElement)の位置まで、画面を自動で滑らかにスクロールさせます。
if (hasError) {
  msg.textContent = '必須項目を入力してください。';
  btn.disabled = false;

  if (firstErrorElement) {
    setTimeout(function() {
      firstErrorElement.scrollIntoView({
        behavior: 'smooth',
        block: 'center'
      });
    }, 100);
  }
  return;
}
block: 'center' を指定することで、エラー箇所がスマートフォンの画面中央にピタリと表示され、ストレスのない修正を促すことができます。
「その他」の値を送信データへ統合するロジック
「その他」に入力されたテキストは、サーバーに渡す前に配列データへ綺麗にマージします。
function processOtherValues(selectedValues, fieldName) {
  const processedValues = [...selectedValues];
  const otherInput = document.getElementById(fieldName + '-other-input');
  if (otherInput && otherInput.value.trim()) {
    const index = processedValues.indexOf('その他');
    if (index !== -1) {
      processedValues[index] = 'その他: ' + otherInput.value.trim();
    }
  }
  return processedValues;
}
この前処理を行うことで、スプレッドシートには「その他: 〇〇希望」といった自然な形式で情報が1セルにまとまって記録されます。
まとめと次回の内容
今回は、ユーザーの入力体験を高める動的な入力制御と、丁寧なエラー案内を実現するバリデーション手法を解説しました。
次回は連載の最終回として、整えられたデータをGAS側で受け取り、ユニークIDを採番してスプレッドシートへ安全に保存する処理と、画面リロードなしで完了画面を表示・初期化するSPA風UIの実装を解説します。


